Photo booth lighting tips are the single most valuable thing you can learn if you want consistently sharp, flattering, professional-quality photos regardless of the venue you're working in. Lighting is the variable that separates a photo guests are proud to display from one they quietly delete on the drive home.
Whether you're setting up a booth for a wedding, a corporate activation, a trade show, or a birthday party, the quality of your lighting determines the quality of every single image that comes out of your setup. This guide covers the techniques, rules, and practical configurations that experienced photo booth operators use to get great results in every kind of venue lighting condition.
Why Lighting Is the Most Important Variable in Photo Booth Photography
You can have the most expensive camera on the market, a beautifully designed custom backdrop, and perfectly branded print templates, and still produce mediocre photos if your lighting is wrong. Conversely, a mid-range camera with excellent lighting will consistently outperform a premium setup in poor lighting conditions.
The reason comes down to how cameras capture light. A sensor needs a sufficient, even, and controlled light source to render accurate colors, sharp details, and natural skin tones. When the ambient light in a venue is inconsistent, too warm, too cool, too dim, or coming from the wrong angle, the camera compensates in ways that introduce noise, color casts, harsh shadows, and unflattering contrast onto your subjects.
Photo booth environments add complexity that standard portrait photography doesn't always face. You're dealing with a continuous stream of different subjects, different outfit colors, different skin tones, and different group sizes, all in the same fixed location, across several hours where ambient venue lighting may shift as the evening progresses. A lighting setup that accounts for all of those variables consistently is what separates professional photo booth operators from amateur ones.
The good news is that getting lighting right for a photo booth is more systematic than it is artistic. Once you understand a few core principles and set your configuration correctly, the setup works for every guest who steps in front of it without constant adjustment. These photo booth lighting tips give you that systematic foundation.
For a look at how top-tier photo booth services combine excellent lighting with advanced technology to produce premium guest experiences, this overview of the best AI photo booth smart features for modern events is worth reading alongside this guide.
Things To Know Before Setting Up Your Photo Booth Lighting

Getting your lighting right starts well before the first guest steps in front of your backdrop. These foundational considerations shape every decision you make about your configuration.
-
Scout the venue before your event day. The ambient lighting conditions in your setup area, including ceiling height, existing fixture color temperature, proximity to windows, and available power outlets, all affect how you configure your own lights. A venue walkthrough a few days before the event is always worth the time.
-
Color temperature consistency is critical. Mixing warm and cool light sources produces color casts that are difficult to correct in post-processing and essentially impossible to fix in a real-time booth output. Decide on your target color temperature, typically 5500K for daylight-balanced or 3200K for tungsten-balanced setups, and ensure every light source in your configuration matches it.
-
Ambient light is your competition. Every light source in the venue that you don't control is working against your setup. Windows, overhead venue fixtures, colored uplighting, and candles all introduce competing light that affects your photos. Positioning your booth to minimize ambient light influence on your subject area is one of the most impactful decisions you make before guests arrive.
-
Modifier choice shapes the quality of light. A bare flash or LED panel produces hard light with sharp shadows. A softbox, umbrella, or ring light diffuses the source and produces softer, more flattering light with gentler transitions between lit and shadow areas. Most photo booth applications benefit from soft light because it's more forgiving across different face shapes and skin tones.
-
Power access matters more than people expect. Professional studio lights draw significant power. Know what circuits are available in your setup area and whether your lighting equipment requires a dedicated circuit. Shared circuits that trip during peak load mid-event are avoidable with a quick conversation with the venue's event coordinator before setup day.
-
Always bring backup lighting. A bulb failure or power issue mid-event without a backup leaves you shooting in venue ambient light for the rest of the night. A spare strobe, a secondary LED panel, or even a high-quality ring light as backup costs far less than the client goodwill you'll lose if the photos suffer for the last two hours of an event.
The Core Lighting Setups Every Photo Booth Operator Should Know
Understanding the established lighting configurations used in portrait and booth photography gives you a reliable starting point for any venue situation. Here's how the most practical setups work and when to use each one.
| Setup Name | Configuration | Best For |
| Ring light | Single circular light mounted at camera level | Compact booths, roaming setups, beauty-focused events |
| Two-light flat | Two softboxes at 45 degrees either side of subject | Standard enclosed and open-air booths, even coverage |
| Three-point lighting | Key light, fill light, and hair or background light | Premium setups, headshot-quality output |
| Clamshell | Two softboxes above and below subject at camera axis | Beauty, glamour, and fashion-forward events |
| Bounced flash | Single strobe bounced off white ceiling or reflector | Low-ceiling venues, natural-feeling results |
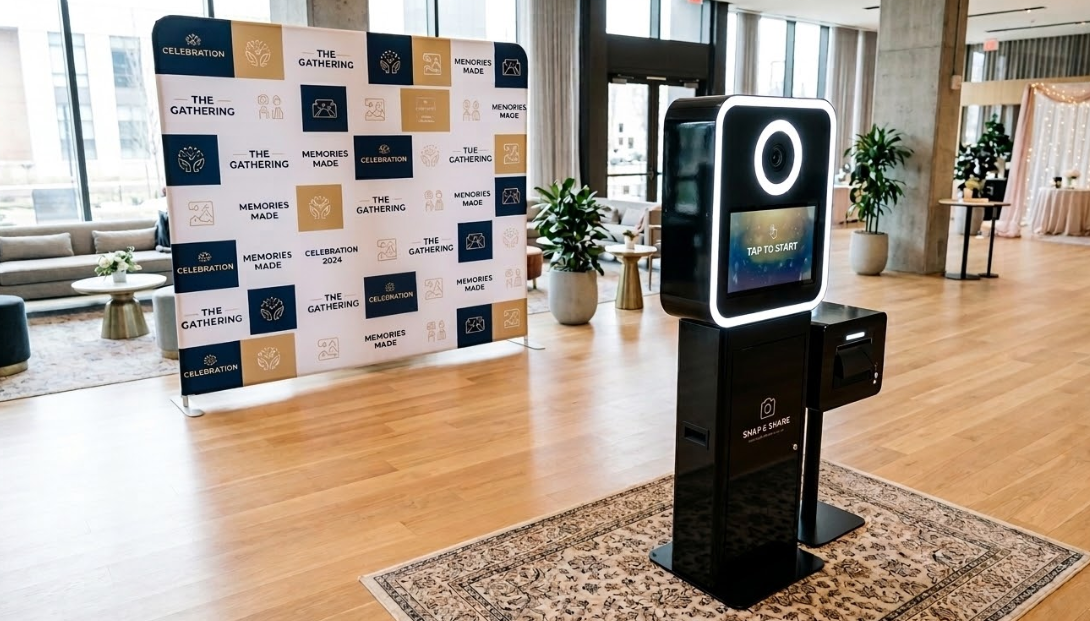
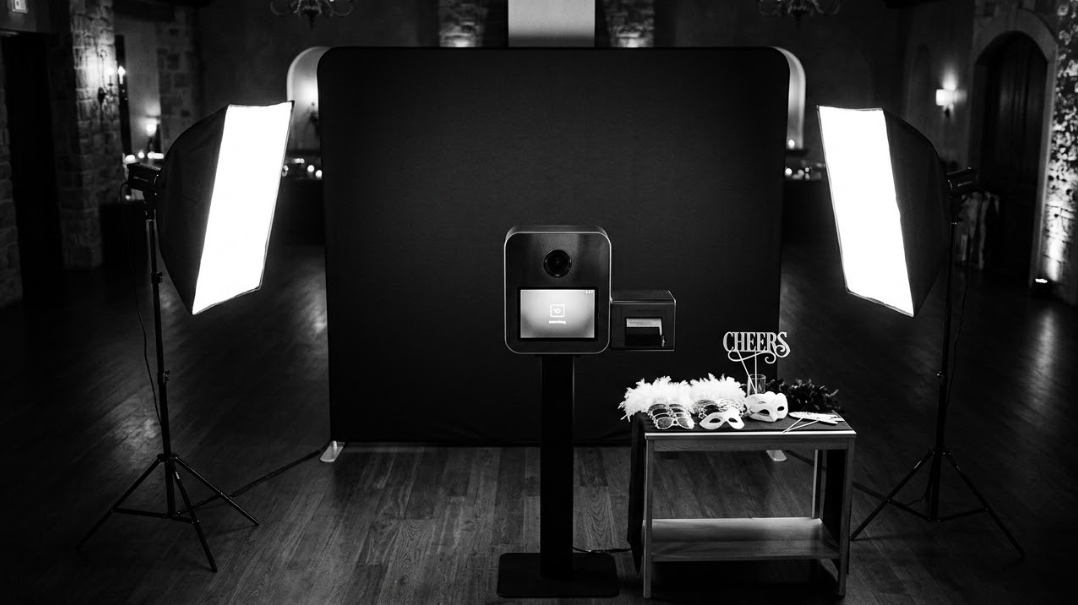
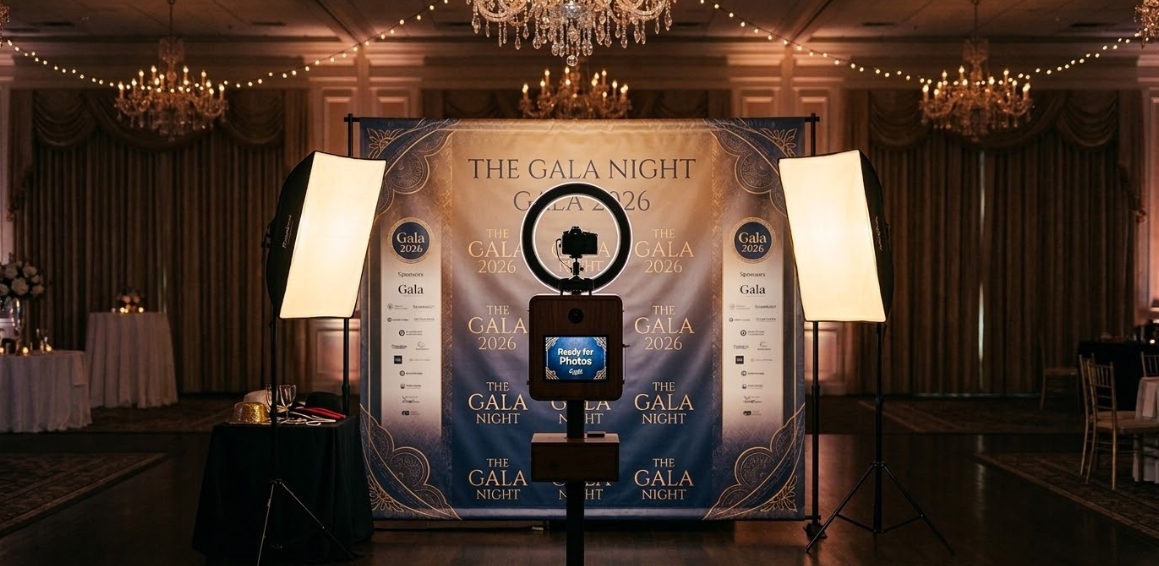
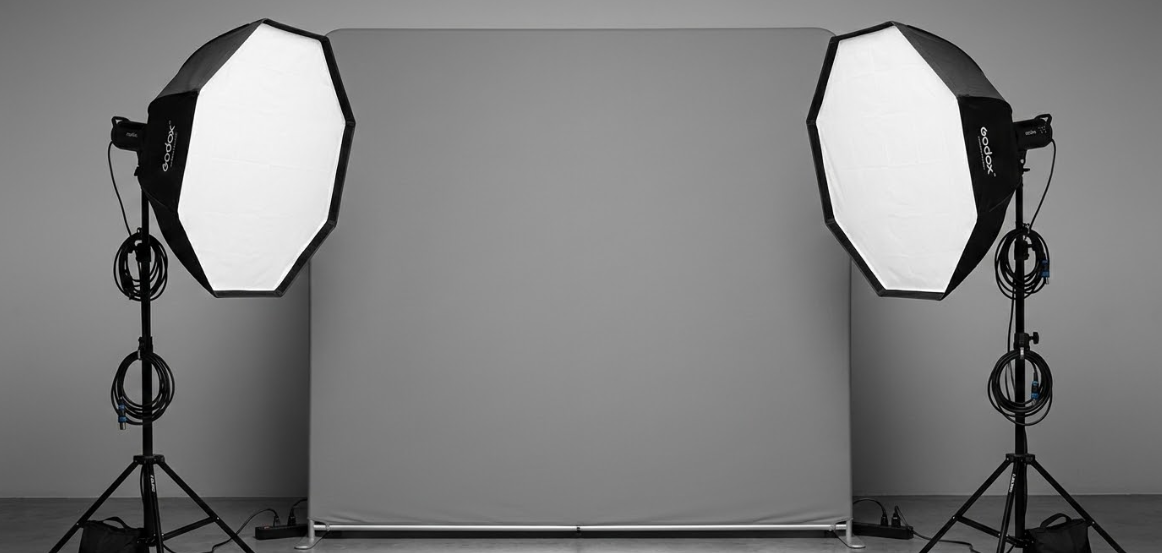
The two-light flat setup is the workhorse configuration for most photo booth applications because it's straightforward to set up, forgiving across different subject types, and produces consistently clean results without requiring constant adjustment between guests. Place one softbox at roughly 45 degrees to the left of your subject and another at 45 degrees to the right, both at approximately head height or slightly above, and you have a reliable base configuration that handles most venue conditions.
The ring light has become a staple for roaming photo booth setups specifically because it's portable, mounts directly to the camera or a lightweight stand, and produces the signature catchlight in subjects' eyes that has become associated with a polished, social-media-ready aesthetic. It's less versatile than a two-light setup for groups but hard to beat for individual portraits in a mobile context.
The 3 Lighting Rule and How It Applies to Photo Booths
The three-point lighting rule is one of the most foundational concepts in portrait photography, and understanding how it applies specifically to photo booth setups helps you make smarter decisions about when a full three-light configuration is worth the added complexity.
Three-point lighting uses three distinct light sources, each serving a specific function. The key light is your primary light source, positioned to one side of the subject at roughly 45 degrees and slightly above eye level, creating the main illumination and defining the shape and texture of the subject's face. The fill light sits on the opposite side at a lower intensity, typically half to two-thirds the power of the key light, and softens the shadows created by the key without eliminating them entirely. The third light, often called a hair light or separation light, is positioned behind and above the subject to create a rim of light around their outline that separates them visually from the background.
For photo booths, the hair light component is where operators most commonly skip corners, and that decision is visible in the finished photos. Without separation lighting, subjects blend into backdrops in a way that makes the image feel flat and two-dimensional. Adding even a low-powered LED panel positioned behind the subject area and aimed at the backdrop or subject outline makes an immediate, visible difference in the perceived quality of the output.
For high-end activations where photo quality is a primary selling point, a full three-point setup is worth the extra equipment and setup time. For standard events where throughput matters as much as image quality, a refined two-light configuration with attention paid to background separation through backdrop distance rather than a dedicated third light is a practical middle ground.
If your booth is being used for professional headshots alongside your event activation, the three-point configuration is essentially non-negotiable. See how a professional headshot setup works alongside event photo booth services at the professional headshots page for a look at how the two experiences can complement each other at the same event.
The Best 2 Light Setup for Headshots at Photo Booth Events
When a photo booth event includes a headshot component, either as a standalone station or as an upgrade option for corporate guests, your two-light configuration needs to be dialed in more precisely than a standard booth setup requires. Here's what works consistently for headshot-quality results with a two-light setup.
Position your key light at roughly 45 degrees to the subject's dominant side, at a height where the light is coming down at approximately 30 to 45 degrees from horizontal. This angle creates the slight shadow under the nose and chin that gives facial features their natural dimensionality without creating the harsh shadows that a steeper angle produces.
Your fill light should be positioned on the opposite side at roughly the same horizontal angle but with noticeably lower output power, targeting a key-to-fill ratio of around 2:1 or 3:1 depending on how much shadow definition you want in the finished image. A 2:1 ratio produces a flatter, more even result that works well for corporate headshots where a clean, approachable look is the goal. A 3:1 ratio creates more dimension and character, which works better for creative professionals and performers.
The distance between your softboxes and your subject matters as much as their angle. Moving a softbox closer to the subject makes the light source effectively larger relative to the subject, which produces softer, more gradual shadow transitions. Moving it further away makes the light source effectively smaller, producing harder shadows with sharper edges. For headshots, keeping your softboxes at a distance of three to five feet from the subject position gives you soft, flattering light that holds up well across different face shapes.
The 20-60-20 Rule in Photography and How It Shapes Your Booth Setup
The 20-60-20 rule is a compositional and tonal balance principle that translates directly into how you think about exposure, background brightness, and the overall visual balance of your photo booth output.
The rule suggests that in a well-composed photograph, roughly 20 percent of the image should be in shadow or dark tones, 60 percent should occupy the mid-tone range where most of your subject detail lives, and 20 percent should be in highlight or bright tones. This distribution creates a visually balanced image that feels natural and readable rather than either washed out or muddy.
For photo booth setups, this principle is most useful when thinking about backdrop brightness relative to your subject exposure. A common mistake is lighting the subject correctly while leaving the backdrop either dramatically overexposed, appearing as a blown-out white mass behind the subject, or so underexposed that it appears as a dark, undefined void. Neither extreme creates an image that reads well at the small format of a print strip or on a phone screen.
Applying the 20-60-20 principle means ensuring your backdrop is lit to a level that complements your subject exposure rather than competing with it. For white or light-colored backdrops, this typically means controlling the light falling on the backdrop separately from your subject lighting, which often requires either a dedicated backdrop light or careful positioning of your main lights to avoid spilling excess illumination onto the background.
For darker or richly colored backdrops, it means ensuring enough light reaches the backdrop to render its true color and texture rather than absorbing it into an undefined shadow. A small LED panel aimed at the backdrop from a low angle is often all it takes to bring the background into the tonal range where it supports rather than competes with your subject.
These photo booth lighting tips around tonal balance make a meaningful difference in the perceived quality of your output, particularly on printed strips where the limited size makes any tonal imbalance immediately noticeable.
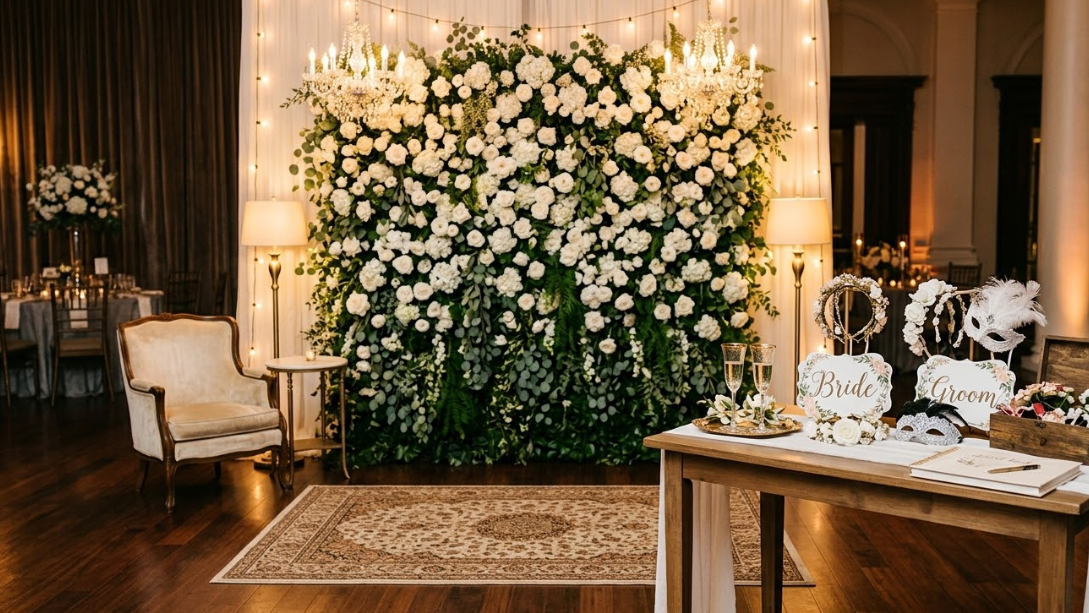
For events where backdrop design and lighting work together as part of a larger branded experience, the post on prom memories made easy and the benefits of photo booth rental shows how a well-lit, well-designed setup elevates the entire guest experience at high-energy events.
Practical Photo Booth Lighting Tips by Venue Type
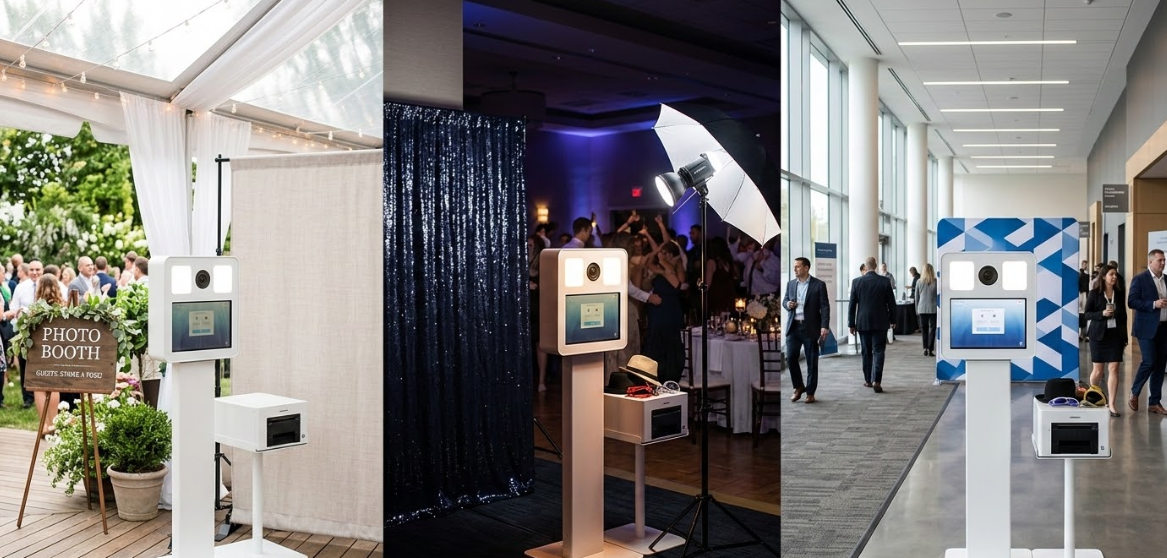
Different venues present different lighting challenges, and having a mental playbook for the most common scenarios saves you significant setup time and prevents the kind of improvised decisions that produce inconsistent results.
In ballrooms and reception halls with warm overhead lighting, your biggest challenge is color temperature conflict. The venue's tungsten or warm LED fixtures create an orange cast that clashes with daylight-balanced strobe output. Setting your camera's white balance to match your strobe color temperature and ensuring your subject area is dominated by your booth lights rather than the venue's ambient light is the most reliable solution. Positioning the booth against a wall rather than in the center of the room limits the angles from which ambient light can reach your subject.
In brightly lit conference centers and trade show floors, the challenge reverses. Harsh overhead fluorescent or cool LED lighting flattens faces and creates unflattering downward shadows. Your booth lights need enough output power to dominate the ambient exposure and effectively become the primary light source for your subject, which typically means shooting at a lower ISO and faster shutter speed to reduce ambient influence while your strobe provides the primary exposure.
For outdoor events in tents or under natural light, diffused daylight is actually one of the more flattering light sources available, but it changes constantly as cloud cover, sun angle, and time of day shift. Positioning your booth to use open shade rather than direct sunlight as your ambient base, then supplementing with a strobe or LED panel to fill shadows and provide consistency as the light changes, gives you much more reliable results than trying to work with direct sunlight alone.
Frequently Asked Questions
What is the best lighting for a photo booth?
The best lighting for a photo booth is a two-light softbox setup with both lights positioned at 45 degrees on either side of the subject, matched to a consistent color temperature of around 5500K for clean, flattering results across different skin tones and outfit colors.
A ring light is the best single-light alternative for compact or roaming setups where a two-light configuration isn't practical. The key quality to prioritize regardless of setup type is softness. Diffused light sources produce more gradual shadow transitions that are universally flattering, while hard direct light creates harsh shadows that require precise positioning to manage and are less forgiving across different subject types.
What is the 3 lighting rule?
The three-point lighting rule uses three distinct light sources: a key light as the primary illumination source, a fill light at lower intensity to soften key light shadows, and a hair or separation light positioned behind the subject to create visual separation from the background.
In photo booth applications, the separation light is the element most commonly skipped, and its absence is visible in finished photos as a flat, two-dimensional quality where subjects merge visually with their backdrop. Adding even a low-powered LED panel aimed at the backdrop or subject outline from behind significantly improves the perceived depth and quality of the output without adding meaningful complexity to your setup process.
What makes a photo booth unforgettable?
A photo booth becomes unforgettable when every element works together seamlessly: excellent lighting that flatters every guest, a genuinely engaging interactive experience, instant high-quality output guests are proud to share, and custom branding that makes the finished photo feel specific to the event rather than generic.
Lighting is the foundation that makes everything else work. A beautifully branded template on a poorly lit photo still looks like a poorly lit photo. But when the lighting is right, even a simple setup with a clean backdrop and a well-designed print template produces results that guests genuinely want to display, share, and keep. That combination of technical quality and thoughtful design is what separates a memorable booth from one that guests forget by the time they get home.
What is the best 2 light setup for headshots?
The best two-light setup for headshots positions a key light at 45 degrees to the subject's dominant side at a 30 to 45 degree downward angle, with a fill light on the opposite side at roughly half to two-thirds the key light's output power, both using large softboxes at a distance of three to five feet from the subject.
This configuration produces soft, dimensionally flattering light with a natural key-to-fill ratio that renders facial features clearly without creating harsh shadows. For corporate headshots where a clean, approachable result is the goal, a 2:1 key-to-fill ratio works best. For creative or dramatic headshots where more character is desired, a 3:1 ratio introduces more visible shadow definition while remaining within the range that most subjects find flattering.
What is the 20-60-20 rule in photography?
The 20-60-20 rule describes a balanced tonal distribution in a well-composed photograph, where approximately 20 percent of the image occupies dark shadow tones, 60 percent lives in the mid-tone range where subject detail is most visible, and 20 percent sits in the highlight range.
For photo booth setups, this principle is most practically applied when balancing the brightness of your backdrop relative to your subject exposure. Backdrops that are significantly brighter or darker than your subject pull the viewer's eye away from the subject and create an image that feels visually unbalanced regardless of how well-lit the subject themselves is. Lighting your backdrop to sit within a complementary tonal range to your subject, rather than leaving it to whatever ambient light reaches it, is one of the most impactful refinements you can make to your overall booth output quality.