 Skip to content
Key Takeaways
- A basic photo booth frame needs just four materials: sturdy cardboard or foam board, a craft knife, decorative trim, and a stand or hanging mechanism.
- Cutting the inner opening before adding any decoration prevents warped edges and uneven cuts.
- Foam board holds up better than plain cardboard for repeated guest handling over a multi-hour event.
- A hand-held frame costs $10-$25 in materials; a standing or hanging frame runs $25-$50 depending on size.
- For a polished, guest-heavy event, a rented booth setup still outperforms a DIY frame on durability and photo quality.
How do you make a photo booth frame? Cut a rectangular opening into a rigid board like foam board or heavy cardboard, decorate the border with your event’s theme, and either attach a handle for guests to hold or mount it to a stand so it’s ready to use without assistance. The whole process takes under two hours for a basic version.
What Is a DIY Photo Booth Frame?
A photo booth frame is a decorative prop with a cutout window that guests hold up or pose behind while someone takes their picture. Unlike a full backdrop, it’s portable, cheap to make, and works at almost any gathering without needing power or dedicated floor space.
Most people search this term while planning a small home event, not a large wedding or corporate function. A frame works well for a kid’s birthday party, a graduation gathering, a baby shower, or a casual office celebration where a full booth rental isn’t in the budget.
Why a DIY Frame Still Matters When Rentals Exist
A DIY frame solves a specific problem: you want a fun photo moment without hiring anyone or renting equipment. For a 15-20 person gathering, spending two hours making a frame instead of $500+ on a rental makes obvious financial sense.
The tradeoff is durability and consistency. A cardboard frame can bend or tear after 30-40 guest interactions, and lighting quality depends entirely on wherever you happen to set it up in the room. For larger events where guest volume and photo quality matter more, a professional setup, like a roaming photo booth rental, holds up better across a full event.
Materials You Need
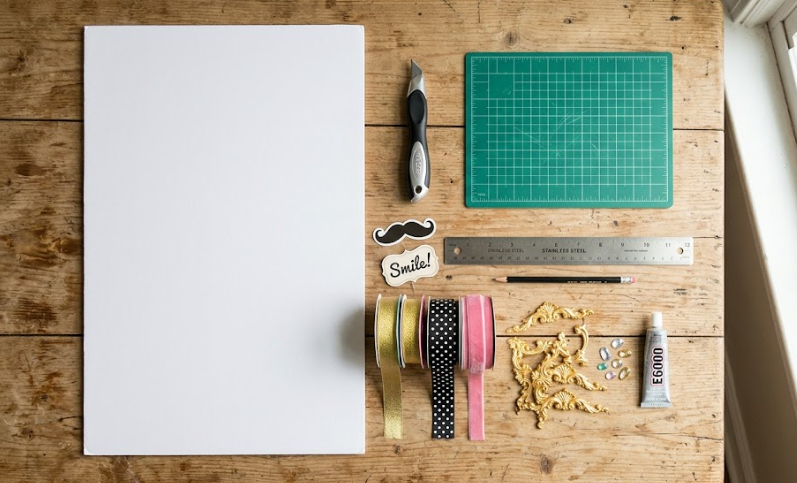
Before cutting anything, gather these basics:
- Rigid board. Foam board (⅜ inch thick) holds shape better than plain cardboard and resists warping from humidity or handling.
- Craft knife and metal ruler. A sharp blade with a straightedge guide produces cleaner cuts than scissors, especially for the inner window.
- Cutting mat or spare cardboard. Protects your table surface and gives the knife a stable cutting base.
- Decorative materials. Paint, washi tape, tissue paper, silk flowers, or themed cutouts depending on your event’s style.
- Handle or stand. A wooden dowel, paint stirrer, or a simple easel back, depending on whether guests will hold it or it’ll stand on its own.
A basic hand-held frame runs $10-$25 in materials if you’re starting from scratch. Reusing boxes or existing craft supplies brings that closer to $5-$10.
Step-by-Step: How to Make a Photo Booth Frame
- Decide on size and shape first. A standard hand-held frame runs about 20×24 inches; a floor-standing frame for group photos works better at 3×4 feet or larger.
- Draw your outer border and inner window on the board. Leave at least 3-4 inches of border on all sides so the frame doesn’t feel flimsy once the center is cut out.
- Cut the inner window first, before decorating. Use a craft knife and metal ruler, cutting in multiple light passes rather than forcing one deep cut, which keeps edges clean.
- Sand or smooth rough edges with fine sandpaper or a nail file if the cut edge feels rough to the touch.
- Add your base color or covering. Paint, wrapping paper, or fabric glued flat gives you a clean surface to build decoration on top of.
- Attach decorative elements around the border. Silk flowers, tissue paper pom-poms, painted lettering, or themed cutouts all work, just keep heavier items closer to the base for balance.
- Add your handle or stand. For a hand-held version, hot-glue a paint stirrer or dowel to the back at the bottom edge. For a standing version, attach an easel back or lean it against a wall-mounted hook.
- Test it before the event. Have someone hold or stand behind it and take a practice photo to check that the opening size actually frames a face and shoulders well.

Choosing a Theme That Actually Photographs Well
Not every decoration choice looks good in a final photo. A few practical guidelines help.
- Avoid busy patterns directly around the window’s edge. They compete with guests’ faces in the frame and make photos look cluttered.
- Use a consistent color palette, three colors max, so the frame reads as designed rather than thrown together.
- Keep 3D elements (flowers, pom-poms) toward the outer edges, not close to the opening, so they don’t cast shadows on guests’ faces.
- Match the frame to your event’s overall aesthetic. Reviewing broader photo booth theme ideas can help translate a general party theme into specific frame decoration choices.
Common Mistakes and Misconceptions
A handful of errors show up repeatedly with first-time DIY frame builders.
- Cutting the window after decorating. This almost always leads to uneven cuts and ruined decoration near the edges. Cut first, decorate second.
- Using plain cardboard for a frame that needs to stand upright. Thin cardboard sags within an hour; foam board or double-layered cardboard holds shape much longer.
- Making the window too small. A window under 16 inches wide often crops out shoulders, leaving awkward, disconnected-looking photos.
- Ignoring lighting placement. Even a well-made frame looks bad in a dim corner. Basic photo booth lighting principles, facing a window or adding a simple lamp, apply just as much to a DIY setup as a professional one.
- Assuming a DIY frame scales to a large event. A hand-held frame works fine for 20-30 guests; beyond that, wear and tear plus long lines make a rented setup a better fit.
DIY Frame vs. Renting a Photo Booth: When Each Makes Sense
A DIY frame makes the most sense for small, casual, budget-conscious gatherings, think a backyard birthday, a small baby shower, or an office desk celebration. The cost is minimal, the setup is fast, and guest volume is low enough that a cardboard or foam board frame holds up fine for the full event.
A rented setup makes more sense once guest count climbs past 40-50 people or the event calls for a more polished result, a wedding, milestone anniversary, or corporate function. At that point, print quality, staffing, and durability matter more than the money saved by building something yourself. Reviewing a full event photo booth service helps clarify what a professional setup adds beyond what a frame alone can deliver.

Making It Sturdy Enough to Last the Whole Event
Even a well-built frame needs reinforcement if it’s going to survive being handled by dozens of guests. Double-layering foam board (gluing two sheets together before cutting) roughly doubles rigidity without much added cost. For a standing frame, weighting the base with a sandbag or heavy books behind an easel stand prevents tipping if a guest bumps it mid-photo.
For frames that’ll travel to a venue rather than stay in one house, consider building it in two or three interlocking pieces rather than one large rigid board, this makes transport far easier and reduces the chance of cracking a single large piece in a car trunk.

Ready to Skip the Craft Table?
If you’d rather guests walk away with professionally printed photos instead of phone snapshots through a cardboard frame, explore Mihi’s full range of photo booth sets to see what a staffed setup can add to your next event.
Frequently Asked Questions
What do I need to create a photo booth?
At minimum, you need a camera (a smartphone works fine), a backdrop or frame prop, decent lighting, and a designated spot with enough space for guests to pose. A simple setup can also include props like hats or signs, and a printed sign explaining how to use the space if no attendant is present. For anything beyond a casual home gathering, reviewing what’s typically included in a full event photo booth service helps you understand what a professional setup adds versus a DIY version.
How do you create photo booth style photos?
Photo booth style comes from a few consistent elements: a clean or themed backdrop, even front-facing lighting that avoids harsh shadows, and a slightly closer framing than a typical candid shot so faces and expressions read clearly. Positioning a light source at eye level, rather than overhead, reduces unflattering shadows under the eyes and chin. Consistent framing across all your photos, using a fixed frame or marked standing spot, also makes the final set of photos look cohesive rather than randomly captured.
Can you do a DIY photo booth?
Yes, a basic DIY photo booth just needs a backdrop or frame, a phone or camera on a stand, and decent lighting, all of which can be assembled for under $50 in most cases. It works well for smaller gatherings under 30-40 guests where you don’t need an attendant or instant printing. For larger events or ones where photo quality and guest flow matter more, a rented roaming photo booth setup typically delivers a more consistent result.
How do you create your own photo frame?
Cut a rigid board like foam board into your desired outer dimensions, then cut a smaller rectangular window inside it using a craft knife and metal ruler for clean edges. Decorate the border with paint, fabric, or themed embellishments after the cutting is complete, since decorating first tends to create uneven cuts. Add a handle for a hand-held version or an easel back for a standing version, and test the opening size with a real person before finalizing the decoration.
Can you DIY picture frames?
Yes, picture frames can be made from foam board, cardboard, wood scraps, or even repurposed materials like an old window frame or embroidery hoop. The process is largely the same as a photo booth frame: cut a clean opening, reinforce the edges if needed, and decorate to match your intended style. For a frame meant to hold a printed photo rather than frame a live pose, adding a backing board and small clips or tape keeps the photo secure without damaging it.