 Skip to content
Key Takeaways
- Photo booth scrapbook ideas work best when you sort prints by theme, color, or timeline before gluing anything down.
- A mix of washi tape, foam dots, and pocket pages keeps booth strips flat while adding dimension.
- Guest message cards paired with photo booth strips turn a simple album into a real event archive.
- Digital-print backups protect against fading, especially for dye-sub prints stored long term.
- Themed layouts (wedding, birthday, corporate) each call for different paper stock and layout pacing.
Photo booth scrapbook ideas are creative layout and design approaches for arranging photo booth strips, guest messages, and event mementos into a cohesive keepsake album. The goal isn’t just storage. It’s turning a stack of loose strips into something someone will actually flip through years later.
What Are Photo Booth Scrapbook Ideas?
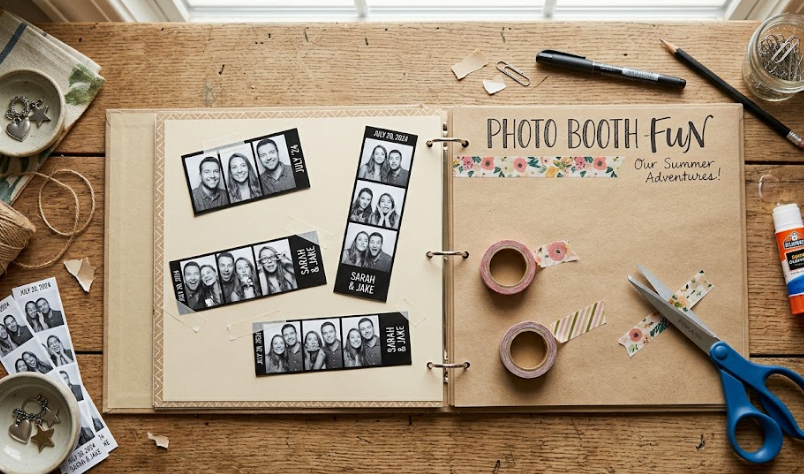
At their core, photo booth scrapbook ideas are structured ways to display booth prints alongside handwritten notes, ticket stubs, and decorative elements in a physical album. Unlike a standard photo album, a scrapbook invites layering: strips get trimmed, matted, and surrounded by context that a plain photo can’t provide on its own.
Most people searching this keyword fall into one of three groups: someone who just hosted an event and has a pile of unsorted strips, a bride or event planner assembling a guest book after the fact, or a hobbyist looking for fresh scrapbook layout inspiration. All three need the same starting point — a system for sorting prints before any glue touches paper.
Why This Matters Right Now
Photo booths have shifted from novelty rental to standard event fixture, and that means more households are sitting on boxes of unsorted strips from weddings, graduations, and office parties. A strip that sits in a drawer for two years fades, curls, or gets lost. A strip that goes into a designed page gets looked at.
There’s also a practical shift worth noting: dye-sublimation prints (common with modern booth rental setups) hold color better than older inkjet strips, but they still benefit from acid-free paper and UV-safe photo corners if you want them to last decades rather than years.
Choosing a Scrapbook Style That Fits Your Photo Booth Prints
Not every album style suits every strip size. Standard photo booth strips run about 2×6 inches, which is narrower than most pre-cut scrapbook slots.
- Pocket-page albums — Best for people who want speed over customization. Buy 2×6 photo sleeves and slide strips in directly.
- Traditional cut-and-paste scrapbooks — Best for anyone who wants full creative control, including hand lettering and layered embellishments.
- Mini accordion books — Good for guest favors or a compact keepsake that doesn’t require a full craft session.
If you’re building an album from a large event like a wedding or corporate launch, consider matching the album’s color palette to the booth backdrop itself. This is one of the reasons a roaming photo booth rental works so well for scrapbook projects: candid shots throughout the venue give you more raw material to build a real story arc, not just posed strips from one corner.
Layout Ideas for Photo Booth Scrapbook Pages Guests Will Love
This is where most people get stuck. A blank page with a strip taped in the middle looks unfinished. A few layout approaches consistently work.
The Timeline Layout
Arrange strips in the order they were taken across the night, left to right, top to bottom. Add small time-stamp labels if your booth software prints them.
The Cluster Layout
Group three to five strips from the same friend group or family in a loose cluster, angled slightly, with a shared caption underneath.
The Message-Pairing Layout
Place one strip next to a guest’s handwritten note. This works particularly well for wedding guest books, where the note and the photo reinforce each other.
A layout technique borrowed from traditional photography books: the rule of three. Rather than filling a page edge to edge, group elements in threes — three photos, three colors, three textures — to keep the eye moving without clutter. It’s a simple trick, but it’s the difference between a page that looks curated and one that looks crowded.

Supplies and Tools That Make Scrapbooking Photo Booth Prints Easier
The right supply list saves hours of frustration.
- Acid-free cardstock — Prevents yellowing over years of storage.
- Photo corners or archival tape — Keeps strips removable without residue.
- Foam adhesive dots — Adds subtle dimension so pages don’t look flat.
- Washi tape — Fast, forgiving, and forgivable if you make a placement mistake.
- Fine-tip gel pens — For captions that won’t bleed through thin paper.
For anyone hosting the event itself and thinking ahead to the scrapbook stage, print variety matters. A custom branded photo booth setup that adds a monogram, date stamp, or event logo to each strip gives scrapbookers a built-in design element instead of a plain white border.
Creative Themes for Weddings, Birthdays, and Corporate Events
Different events call for different pacing and material choices.
Weddings: Soft cream or blush cardstock, calligraphy captions, and strips paired with guest well-wishes. A vintage photo booth setup pairs especially well here, since sepia-toned or black-and-white strips already read as heirloom material before you’ve even added a single embellishment.
Birthdays and graduations: Bright cardstock, bold stickers, and a looser layout style. A graduation party photo booth tends to generate high-energy, expressive strips that suit a more playful, less structured page design.
Corporate events: Clean grid layouts, minimal embellishment, brand-colored cardstock. If the event used activation elements tied to a launch or milestone, referencing brand activation ideas from the original event can help you decide which strips represent the core moments worth featuring on the first page.

Common Mistakes and Misconceptions
Even experienced scrapbookers run into predictable problems with booth strips specifically.
- Using regular glue instead of archival adhesive. Standard glue sticks can cause strips to yellow or peel within a year.
- Overcrowding the first few pages. Save your best strips for the middle of the album; a slow build keeps the reveal interesting.
- Ignoring strip curl. Booth strips often curl slightly after printing. Press them flat under a heavy book for 24 hours before mounting.
- Skipping a backup scan. Physical strips fade. Scan or photograph each page before it’s sealed into the album.
- Assuming all strips need captions. Sometimes a strip needs nothing more than a border and breathing room.
If you’re planning the booth setup itself with future scrapbooking in mind, it’s worth reviewing general photo booth mistakes to avoid before the event, since print quality issues at the source (smudged ink, low-resolution templates) can’t be fixed later at the craft table.
Step-by-Step Framework for Building Your Album
- Sort first. Group all strips by date, theme, or guest before touching adhesive.
- Cull duplicates. Keep the best version of any near-identical strip; you don’t need six copies of the same pose.
- Flatten curled strips under weight for a full day.
- Choose your layout style per page (timeline, cluster, or message-pairing) rather than mixing styles randomly.
- Mount with archival adhesive, leaving room for captions.
- Add embellishments last, once the photo placement is locked in.
- Scan finished pages for a digital backup before sealing the album shut.
For an extra layer of personalization, some hosts add novelty elements straight from the event. A Sketchbot Booth drawing, for example, can sit right alongside a photo strip from the same guest, giving a scrapbook page two different keepsake formats from a single moment. Similarly, prints from a Vogue Photo Booth setup tend to have a magazine-cover look that anchors a page beautifully as a focal image, with smaller candid strips arranged around it.

Making Your Photo Booth Memories Last
A shoebox full of loose strips is a memory waiting to fade. A well-built scrapbook is a memory someone will actually revisit. The difference comes down to a handful of habits: sorting before gluing, using archival materials, and picking a layout style that matches the tone of the event.
If you’re still in the planning stage for an upcoming event and want prints worth scrapbooking later, start with quality output. Photo booth sets and templates designed with clean backgrounds and consistent lighting give you far better raw material than a rushed, mismatched setup. Browse Mihi’s photo booth sets or explore professional headshot booth options if your event calls for a more polished, portrait-style print that scrapbooks beautifully on its own.
FAQs About Photo Booth Scrapbook Ideas
What is the rule of three in scrapbooking?
The rule of three is a design principle where elements are grouped in sets of three — three photos, three colors, or three textures — rather than spread evenly across a page. It creates visual balance without making a layout feel stiff or overly symmetrical. Scrapbookers use it to avoid the common trap of either an empty-looking page or one that’s overcrowded. Applying it to photo booth strips means clustering three related shots together instead of scattering single strips across multiple pages.
What are some cute photo booth ideas?
Cute booth ideas usually combine a strong visual backdrop with a prop or format guests remember, like a glambot slow-motion capture, a graffiti wall backdrop, or a themed prop table matching the event’s colors. For a scrapbook afterward, the “cutest” results tend to come from candid roaming shots rather than stiff posed ones. Booths that encourage movement and interaction, rather than a static pose-and-click setup, generate the kind of expressive, story-driven strips that make the best scrapbook material.
How do I make a photograph scrapbook?
Start by sorting all your photos or strips by date or theme, then choose acid-free cardstock and archival adhesive to protect them long term. Decide on a layout style per page (timeline, cluster, or paired-caption) rather than mixing approaches inconsistently throughout the book. Add embellishments like washi tape or stickers only after your main photo placement is finalized. Finally, scan or photograph each completed page as a digital backup before sealing the album.
How can I make my photo booth pics unique?
Unique booth photos usually come from unusual formats rather than unusual poses, think 360-degree spins, slow-motion capture, or hand-drawn sketch add-ons paired with the print. Custom overlays, event branding, or a themed backdrop also help a strip stand out from a generic white-background booth photo. When scrapbooking, uniqueness comes from pairing the photo with a handwritten note or an object from the event, like a ticket stub or a name tag, rather than the photo alone.
What are the latest trends in photo booths?
Current booth trends lean toward AI-enhanced templates, roaming or mobile booth formats that capture candid moments throughout a venue, and interactive add-ons like sketch or robot-hosted booths that create a second physical keepsake alongside the printed photo. Guests increasingly expect both a physical print and a shareable digital version delivered instantly. For scrapbookers, this trend is good news: more format variety per event means richer, more textured pages when it’s time to build the album.